Creating compelling visual content is fundamental for engaging audiences and achieving marketing objectives. Yet, even with advanced equipment, suboptimal camera settings can undermine image quality, leading to missed opportunities for conversion and engagement. Understanding how aperture, shutter speed, ISO, white balance, and focus modes interact is not just a technical exercise; it's a strategic decision that directly impacts the clarity, mood, and professional polish of your visual assets. This guide compares these critical settings, detailing their individual roles and collective influence on the final image, providing a framework for making informed choices that elevate your content.
Understanding the Exposure Triangle: Aperture, Shutter Speed, and ISO
The "exposure triangle" refers to the three primary settings that control the amount of light reaching your camera's sensor: aperture, shutter speed, and ISO. Mastering their interplay is crucial for achieving correctly exposed images while also manipulating creative elements like depth of field and motion blur.
Aperture: Controlling Depth and Light
Aperture, measured in f-stops (e.g., f/2.8, f/8, f/16), dictates the size of the lens opening. A smaller f-number (e.g., f/2.8) signifies a wider opening, allowing more light in and producing a shallower depth of field (more background blur). A larger f-number (e.g., f/16) indicates a narrower opening, admitting less light and resulting in a greater depth of field (more of the scene in focus).
Impact for visual content:
- Product Photography: Use a narrower aperture (higher f-stop) like f/8 to f/16 to ensure the entire product is sharp, from front to back.
- Portraits/Lifestyle: A wider aperture (lower f-stop) like f/1.8 to f/4 isolates the subject from the background, creating a pleasing bokeh effect that draws attention.
- Landscape/Architectural: A narrower aperture (f/8 to f/16 or higher) keeps foreground, mid-ground, and background sharp, conveying the full scope of a scene.
Shutter Speed: Freezing Motion or Creating Flow
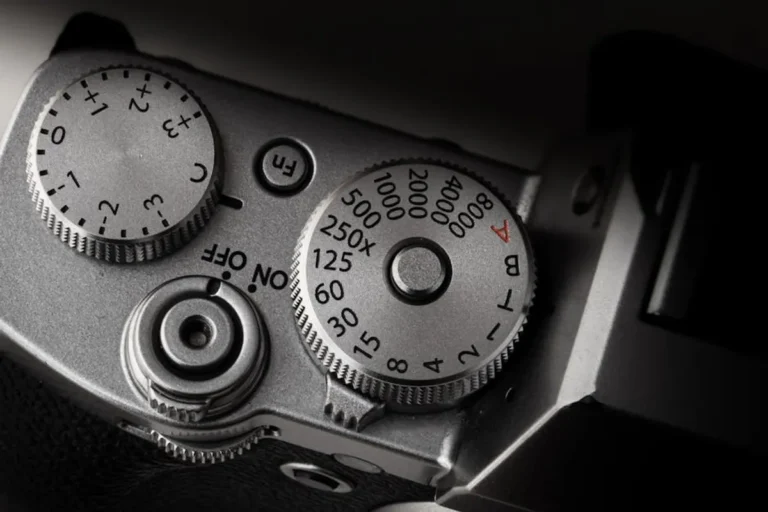
Shutter speed determines the duration the camera's sensor is exposed to light, measured in fractions of a second (e.g., 1/1000s, 1/60s) or full seconds. A fast shutter speed (e.g., 1/500s) freezes motion, while a slow shutter speed (e.g., 1/30s or longer) allows for motion blur, useful for conveying movement or capturing light trails.
Impact for visual content:
- Action/Event Shots: Fast shutter speeds (1/250s or faster) are essential for sharp images of moving subjects, such as sports, candid event photography, or children.
- Low-Light Conditions: Slower shutter speeds can compensate for dim lighting by allowing more light to reach the sensor, though this often requires a tripod to prevent camera shake.
- Creative Effects: Intentional motion blur (e.g., for flowing water or light trails) requires slow shutter speeds (1/30s to several seconds), adding artistic flair to specific content types.
ISO: Light Sensitivity and Image Noise
ISO controls the camera sensor's sensitivity to light. A lower ISO (e.g., 100 or 200) indicates less sensitivity, producing cleaner images with minimal digital noise (grain). A higher ISO (e.g., 800, 1600, or higher) increases sensitivity, allowing for shooting in darker conditions but at the cost of introducing more noticeable noise, which can degrade image quality.
Impact for visual content:
- Optimal Image Quality: Always aim for the lowest possible ISO (base ISO, typically 100 or 200) to ensure the cleanest, most detailed images, especially for high-resolution marketing assets.
- Challenging Light: When aperture and shutter speed cannot gather enough light, increasing ISO becomes necessary. This is common in indoor events, concerts, or dimly lit environments where a flash is undesirable or impractical.
- Balancing Act: For web use, a slightly higher ISO with minimal noise might be acceptable, but for print or large displays, noise becomes more problematic.
Beyond Exposure: White Balance and Focus Modes for Precision
While the exposure triangle manages light, white balance and focus modes are equally critical for ensuring accurate color and sharpness, directly influencing the professional perception of your visual content.
White Balance: Ensuring Accurate Color Representation
White balance adjusts the color temperature of your image, ensuring that white objects appear white under different lighting conditions. Measured in Kelvin (K), it compensates for the color cast of various light sources (e.g., warm incandescent, cool fluorescent, neutral daylight). Incorrect white balance can result in images with an unwanted blue, orange, or green tint.
Impact for visual content:
- Brand Consistency: Accurate colors are paramount for product photography and brand imagery. Consistent white balance ensures products appear true-to-color across all marketing channels.
- Professionalism: Correct white balance lends a polished, professional look to all visuals, avoiding distracting color shifts that can detract from your message.
- Mood and Atmosphere: While generally aiming for accuracy, intentional warm or cool white balance can be used creatively to evoke specific moods, but this should be a conscious choice.
Focus Modes: Achieving Critical Sharpness
Focus modes determine how your camera achieves and maintains sharpness on your subject. Common modes include Single-Shot Autofocus (AF-S/One-Shot AF) for stationary subjects, Continuous Autofocus (AF-C/AI Servo AF) for moving subjects, and Manual Focus (MF) for precise control.
Impact for visual content:
- Product Detail: AF-S is ideal for static product shots, ensuring critical sharpness on specific features.
- Event/Action: AF-C is essential for capturing sharp images of people or objects in motion, ensuring the focus tracks the subject as it moves.
- Creative Control: Manual focus is valuable for macro photography, specific artistic effects, or in very challenging light where autofocus struggles.
Integrating Settings for Optimal Visual Storytelling
The true power of these settings emerges when they are understood not in isolation, but as interconnected tools for visual storytelling. Each choice influences the others, requiring a balanced approach based on your primary creative and commercial goals.
Pro Tip: When shooting, prioritize your primary visual goal. If depth of field is critical (e.g., isolating a product), set your aperture first. If motion is key (e.g., freezing action), set your shutter speed. Then, adjust the remaining settings (ISO and the third exposure triangle element) to achieve correct exposure without compromising your main objective. Always check your white balance and focus critically.
Applying Settings for Specific Content Needs
Different content types demand different setting priorities:
- Studio Product Photography:
- Aperture: f/8-f/16 (maximum sharpness)
- Shutter Speed: 1/125s - 1/250s (with studio strobes) or slower (with continuous light and tripod)
- ISO: 100-200 (lowest for cleanest image)
- White Balance: Custom or Flash (for color accuracy)
- Focus: AF-S (precise focus on product)
- Outdoor Lifestyle/Portraits:
- Aperture: f/1.8-f/4 (shallow depth of field)
- Shutter Speed: 1/250s or faster (to freeze subject movement)
- ISO: 100-400 (keep low for quality, adjust for light)
- White Balance: Daylight/Cloudy (match ambient light)
- Focus: AF-C (track moving subjects)
- Event Photography (Low Light):
- Aperture: f/2.8-f/4 (wide open for light)
- Shutter Speed: 1/60s - 1/125s (fast enough to avoid blur, slow enough for light)
- ISO: 800-3200+ (as high as needed, balanced with noise tolerance)
- White Balance: Incandescent/Fluorescent/Custom (match venue lighting)
- Focus: AF-C (track subjects in motion)
Mastering Your Camera Settings: A Practical Approach
The journey to mastering camera settings is iterative. Begin by understanding the individual impact of each setting, then practice adjusting them in various lighting scenarios. Experiment with different combinations to see how they affect the final image. Regularly review your results, paying close attention to sharpness, exposure, color accuracy, and overall mood. This hands-on approach, combined with a clear understanding of your content goals, will enable you to consistently produce high-quality visual assets that resonate with your audience and support your marketing efforts.
Frequently Asked Questions About Camera Settings
What are the best settings for outdoor portraits?
For outdoor portraits, prioritize a wide aperture (f/1.8-f/4) to blur the background, a shutter speed of at least 1/250s to freeze subtle movements, and the lowest possible ISO (100-200) for clean images. Set white balance to 'Daylight' or 'Cloudy' depending on conditions.
How do I avoid blurry photos in low light?
To minimize blur in low light, use a wide aperture lens (e.g., f/2.8 or wider) to let in more light. Increase your ISO to make the sensor more sensitive, but be mindful of noise. If subjects are stationary, use a slower shutter speed with a tripod. For moving subjects, increase ISO and use the fastest possible shutter speed without underexposing.
When should I use manual mode over automatic?
Use manual mode when you need precise control over all aspects of exposure and creative effects, such as specific depth of field, motion blur, or when shooting in challenging, inconsistent lighting. Automatic modes are convenient but often compromise on creative intent or optimal image quality in complex scenarios.
What is the relationship between aperture and depth of field?
Aperture directly controls depth of field. A wider aperture (smaller f-number like f/2.8) results in a shallower depth of field, meaning less of the scene is in focus and the background is more blurred. A narrower aperture (larger f-number like f/16) results in a greater depth of field, keeping more of the scene sharp from foreground to background.